How Do Gel X Nails Work?
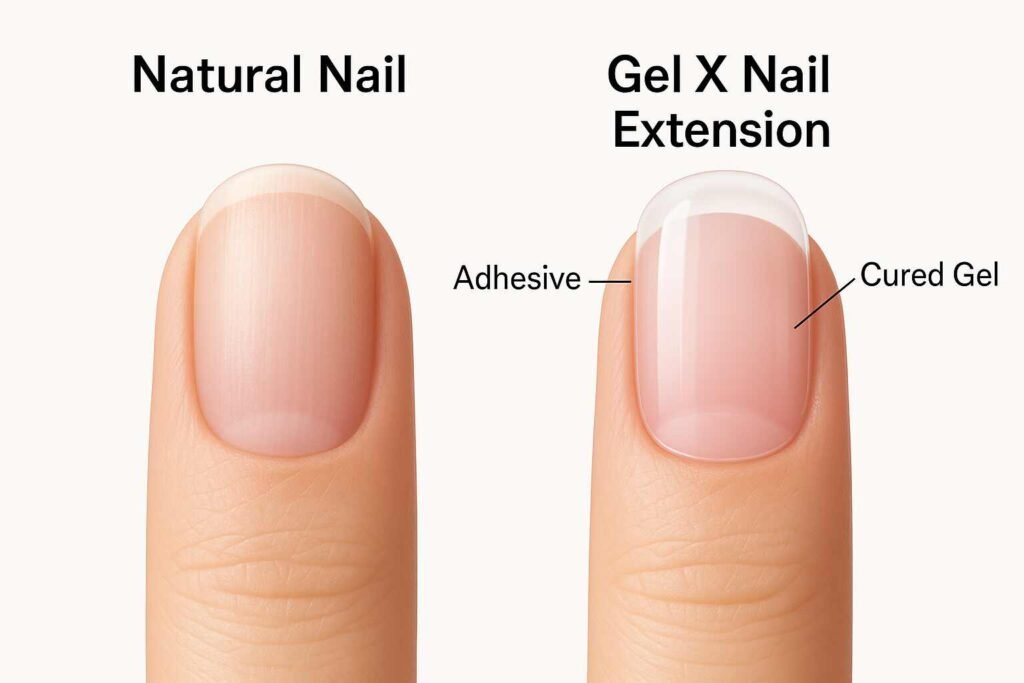
Gel X Nails work by using a unique gel formula that bonds with your natural nail. The process is simple and can be done at home or in a salon. Follow these steps:
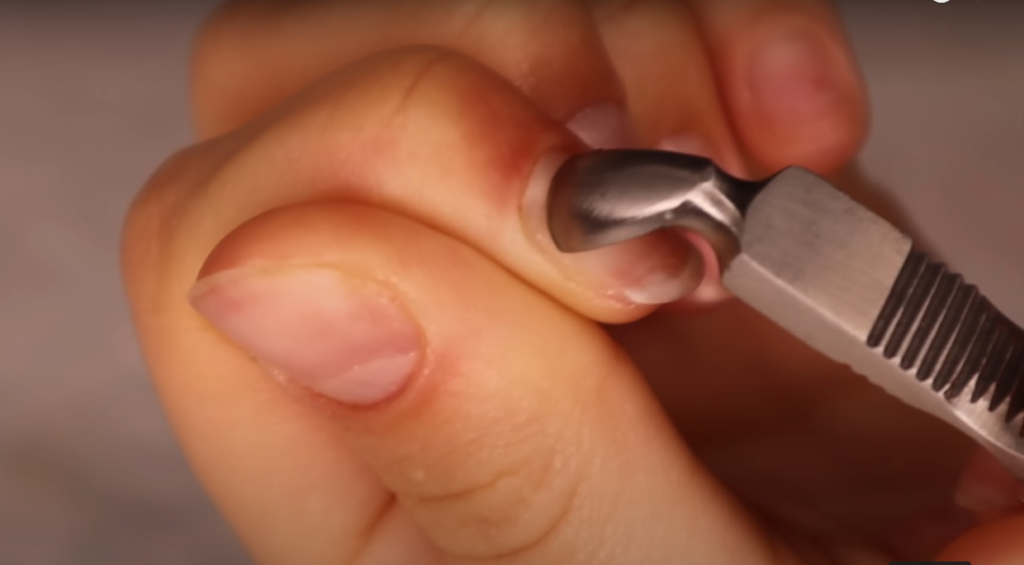
Step 1 – Prepare Your Natural Nails
Before applying Gel X Nails, you must prepare your natural nails:
- Clean: Wash your nails with soap and water.
- Buff: Lightly buff the surface of your natural nails to remove shine.
- Shape: Trim and file your nails to the desired length and shape.
- Clean Again: Wipe off any dust or oil with a nail cleanser or rubbing alcohol.

Step 2 – Select Your Gel X Nail Set
Gel X Nails come in pre-designed sets or customizable options. Choose the style that suits your taste:
- Standard Shapes: Square, oval, or almond.
- Design Options: Solid colors, glitter, or decorative art.
- Size: Ensure you select the correct size for your natural nails.
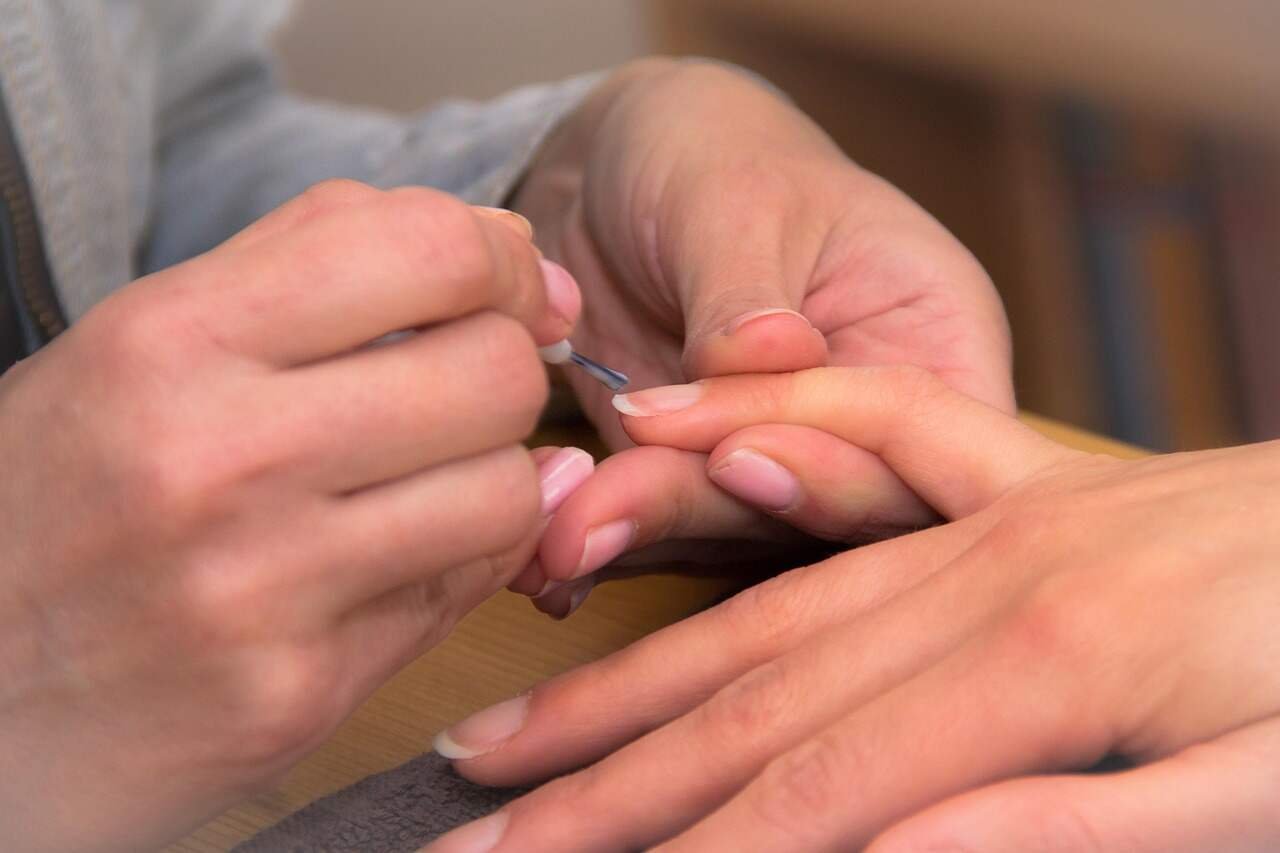
Step 3 – Apply the Adhesive
Gel X Nails use a special adhesive to bond to your natural nails:
- Glue Application: Apply a thin layer of the gel adhesive to your natural nail.
- Even Spread: Make sure the glue is spread evenly for a strong bond.
- Wait a Few Seconds: Allow the adhesive to become tacky (not fully dry) before applying the nail.
Tip: Follow the product instructions carefully for the best results.
Step 4 – Place the Gel X Nail
Once your adhesive is ready, it’s time to apply the nail:
- Align: Carefully align the Gel X Nail with your natural nail.
- Press Down: Press firmly for a few seconds to ensure a good bond.
- Repeat: Apply all nails in the same manner.
Step 5 – Cure Under a Lamp
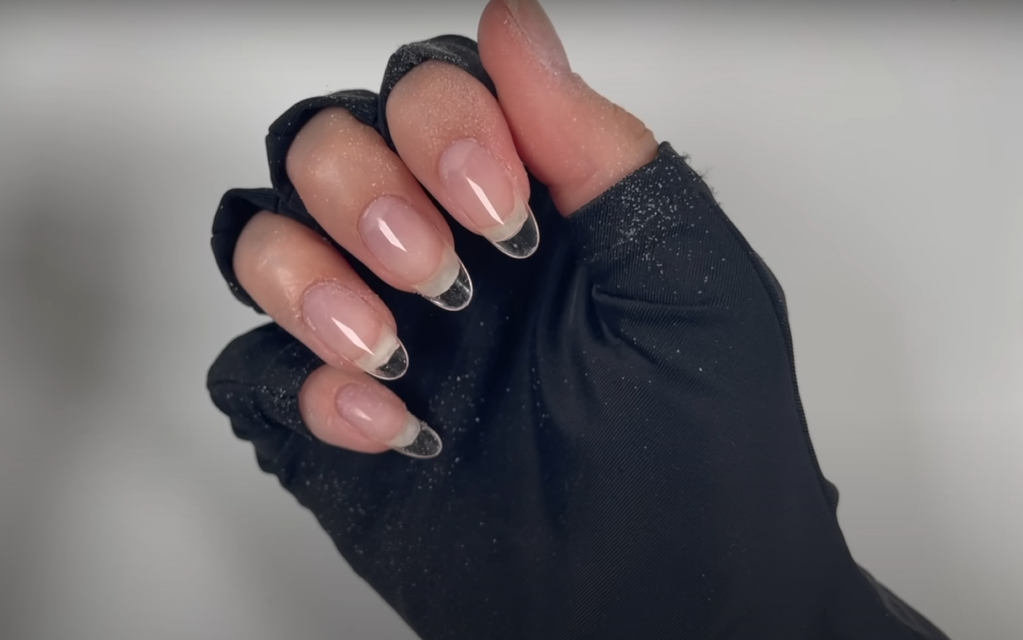
The final step is to cure the nails under a UV or LED lamp:
- Lamp Curing: Place your hand under the lamp as directed by the product.
- Set Time: Cure for the recommended time (usually 30-60 seconds per nail).
- Finish: After curing, your Gel X Nails should be hard and shiny.
Benefits of Gel X Nails
Gel X Nails offer many advantages over traditional nail enhancements. They are a favorite for many reasons:
- Ease of Use: They are simple to apply at home.
- Time-Saving: The application process is quick.
- Long-Lasting: Properly applied Gel X Nails can last 2-3 weeks.
- Less Damage: They cause less damage to your natural nails compared to acrylics.
- Variety: A wide range of designs and colors is available.
- Professional Look: They mimic the appearance of a professional gel manicure.
- Low Maintenance: With proper care, they need fewer touch-ups.
- Customizable: Many brands offer options to trim and file the nails for a perfect fit.

Gel X Nails vs. Other Nail Systems
It is important to know how Gel X Nails compare with other popular nail systems. Here’s a brief comparison:
Gel X Nails vs. Acrylic Nails
- Application: Gel X Nails are press-on and require adhesive, while acrylics are sculpted directly onto the natural nail.
- Damage: Acrylics can weaken natural nails, but Gel X Nails are gentler.
- Removal: Acrylics need soaking and filing; Gel X Nails are removed with special solutions.
- Cost and Time: Gel X Nails are faster and often less expensive.
Gel X Nails vs. Traditional Press-On Nails
- Finish: Gel X Nails have a glossy, gel-like finish. Traditional press-ons may look flat.
- Durability: Gel X Nails are more durable and longer-lasting.
- Curing: Gel X Nails require curing under a lamp. Traditional press-ons do not.
- Design Options: Both come in many designs, but Gel X Nails offer a more professional look.
Gel X Nails vs. Gel Polish
- Application: Gel X Nails are extensions that add length and shape, while gel polish is applied directly to the natural nail.
- Durability: Both are long-lasting, but Gel X Nails can add extra strength.
- Removal: Gel polish is removed by soaking, while Gel X Nails require careful peeling or professional removal.
- Versatility: Gel X Nails are ideal for dramatic length and shape, whereas gel polish enhances your natural nail.
Step-by-Step Guide to Applying Gel X Nails
Here is a detailed guide on how to apply Gel X Nails. Follow these steps to ensure a perfect application at home.
Tools and Materials Needed
- Gel X Nail Set: Your chosen design and size.
- Nail Glue/Adhesive: Specific to Gel X Nails.
- Nail File and Buffer: To shape and prep your natural nails.
- UV or LED Lamp: To cure the nails.
- Cuticle Pusher: To gently push back cuticles.
- Nail Cleanser or Rubbing Alcohol: To clean your nails before application.
- Optional: A small brush to apply glue evenly.
Detailed Application Steps
- Prep Your Natural Nails:
- Remove old nail polish.
- Clean your nails with rubbing alcohol.
- Push back cuticles gently.
- File and buff your nails to create a smooth surface.
- Wipe off any dust.
- Remove old nail polish.
- Select the Correct Size:
- Check the size chart that comes with your Gel X Nail set.
- Lay the nails over your natural nails to choose the best fit.
- If necessary, file the sides for a perfect fit.
- Check the size chart that comes with your Gel X Nail set.
- Apply the Adhesive:
- Apply a thin, even layer of glue to your natural nail.
- Spread the adhesive with a small brush or your finger.
- Wait for 10–15 seconds until the glue becomes tacky.
- Apply a thin, even layer of glue to your natural nail.
- Place the Gel X Nail:
- Align the Gel X Nail carefully over your natural nail.
- Press down firmly for 5–10 seconds.
- Repeat for all nails.
- Align the Gel X Nail carefully over your natural nail.
- Cure Under a Lamp:
- Place your hand under a UV or LED lamp.
- Follow the manufacturer’s instructions for curing time (usually 30–60 seconds per nail).
- Ensure all nails are evenly cured.
- Place your hand under a UV or LED lamp.
- Finish and Shape:
- Once cured, file the tips if needed to refine the shape.
- Buff the edges lightly to smooth out any rough areas.
- Wipe your nails with a cleanser to remove any residue.
- Once cured, file the tips if needed to refine the shape.
Maintenance and Removal of Gel X Nails
Proper care extends the life of your Gel X Nails and keeps your natural nails healthy.
How to Maintain Gel X Nails
- Keep Them Dry: Avoid prolonged exposure to water for the first few hours.
- File Regularly: Lightly file any rough edges every few days.
- Avoid Harsh Chemicals: Use gloves when cleaning or doing dishes.
- Moisturize: Apply cuticle oil daily to keep your natural nails and cuticles hydrated.
- Do Not Pick or Peel: Avoid lifting or peeling the nails to prevent damage.
How to Remove Gel X Nails Safely
Removing Gel X Nails should be done carefully to avoid damaging your natural nails.
Removal Methods
- Soaking Method:
- Step 1: File the top layer of your Gel X Nail to break the seal.
- Step 2: Soak your nails in acetone for 10-15 minutes.
- Step 3: Gently lift the nail off using a cuticle pusher.
- Step 4: Wash and moisturize your natural nails after removal.
- Step 1: File the top layer of your Gel X Nail to break the seal.

Learn more about safe nail removal techniques on our nail care guide.
Pros and Cons of Gel X Nails
Like any beauty product, Gel X Nails have advantages and disadvantages. Here’s a balanced look:
Pros
- Easy Application: You can apply them at home with minimal tools.
- Salon Quality: They give a professional, high-gloss finish.
- Durability: They are strong and last for weeks.
- Variety: Many styles and designs to choose from.
- Low Maintenance: When applied correctly, they need minimal touch-ups.
- Less Damage: They are gentler on natural nails than traditional acrylics.
Cons
- Adhesive Issues: If not applied correctly, nails may lift.
- Curing Required: You need a UV or LED lamp for curing.
- Removal Process: Removing Gel X Nails requires special techniques to avoid nail damage.
- Cost: They can be more expensive than traditional press-on nails.
- Skill Needed: There is a slight learning curve for proper application and curing.
Frequently Asked Questions About Gel X Nails
Here are some common questions that people ask about Gel X Nails:
What Are Gel X Nails Made Of?
Gel X Nails are made from a flexible gel material that is cured under UV or LED light. They are designed to bond gently to your natural nails.
How Long Do Gel X Nails Last?
When applied correctly, Gel X Nails can last between 2 to 3 weeks. Proper care and maintenance can extend their lifespan.
Are Gel X Nails Safe for My Natural Nails?
Yes, when applied and removed properly, Gel X Nails cause less damage compared to acrylic or traditional press-on nails.
How Do I Remove Gel X Nails?
You can remove them by filing the top layer, soaking in acetone, and gently lifting them off. Alternatively, seek professional help for safe removal.
Can I Do Gel X Nails at Home?
Absolutely! Many users apply Gel X Nails at home with minimal tools. Just follow the instructions carefully for the best results.
What Are the Benefits of Gel X Nails?
Benefits include easy application, a professional look, long-lasting wear, and less damage to your natural nails compared to other systems.
Additional Tips and Tricks for Gel X Nails
To make the most of your Gel X Nails, follow these expert tips:
Expert Tips
- Practice Makes Perfect: Don’t worry if your first application isn’t perfect. Practice helps you learn.
- Use Quality Tools: Good nail files, buffers, and a reliable UV lamp can improve your results.
- Follow Instructions: Read the product instructions carefully for the best results.
- Be Patient: Allow the adhesive to become tacky before applying the nail.
- Moisturize Post-Removal: After removal, treat your natural nails with cuticle oil and a good moisturizer.
- Store Properly: Keep your Gel X Nail set in a cool, dry place to maintain quality.
- Quick Application Systems: Expect even faster and easier application methods.
- Longer Wear: Innovations in adhesive and gel formulas could extend the life of press-on nails.
- Improved Removal: Safer removal methods that protect your natural nails will become more common.
- Tech Integration: Some nail systems may use apps or smart devices to help you choose the best fit and design.
Conclusion
Gel X Nails offer a modern, easy, and salon-quality nail extension solution. They combine the convenience of press-on nails with the durability and glossy finish of gel nails. With proper preparation, application, and maintenance, Gel X Nails can give you beautiful, long-lasting nails that enhance your overall look.
By following this guide, you will learn how to:
- Prepare your natural nails for Gel X application.
- Choose the right Gel X Nail set.
- Apply adhesive and cure your nails under a UV/LED lamp.
- Maintain and remove Gel X Nails safely.
- Enjoy the benefits of a durable, customizable, and low-damage nail extension system.
Whether you are new to nail extensions or a seasoned nail enthusiast, Gel X Nails are a great option for achieving a professional look at home. Embrace the trend, experiment with different designs, and enjoy the benefits of having gorgeous, well-maintained nails.

